'/%3E%3C/svg%3E)


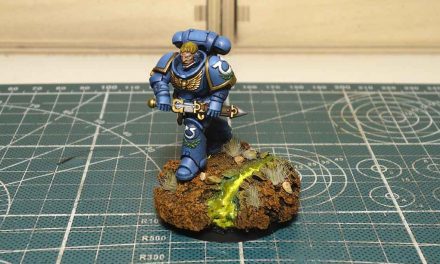
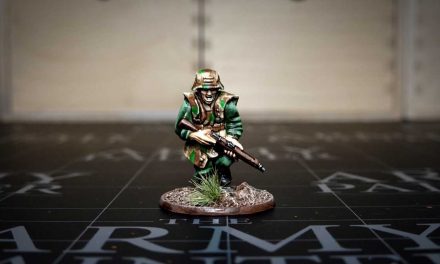
In Bolt Action the US Airborne are the second army we encounter here on Miniatures of Death from the Warlord Games wargame we learned about with German grenadiers. Also this time, from the feedback received for social media, I didn’t take much with the colors of the uniform. Like last time, I kept to the colors of the miniatures shown in the box, but obviously the greens I chose are a little too saturated.
In any case, let’s not dwell much on colors but on how to use them. I’m going to use colors from The Army Painter here, but if you have other colors available or you’re better than me at defining an army’s historic color palette, you’re free to use different ones.
Painting Bolt Action US Airborne: Preparing the miniature
As I did for the German grenadier, to paint Bolt Action’s Amercian parachutes, I took a cue from the illustrations in the Band of Brothers box, identified all the parts in the frames and separated them. Perhaps Warlord could work a little more on building instructions and possibilities here. In fact, I found it a bit difficult to understand which parts are needed which are interchangeable. I limited myself to referring to the image on the box prints.
On balance, 5 pieces are required to assemble a single soldier: torso, head, two arms and backpack. Actually, as you will see later, I also added a sixth piece, some grenades hanging on the left side of our paratrooper.
As always, all the parts obtained must be cleaned before being assembled. Help yourself with a cutter being very careful. Not so much to your fingers, those who cares, but I would not like you to find yourself with a soldier with an amputated leg useful only for the scenography …
As already mentioned in many other videos, in case you haven’t seen any yet, pay attention to the mold lines, they are very evident once the miniature is colored. Once the cleaning is complete, we just have to glue all the parts. Be careful not to overdo the glue, if in excess it could compromise the details. For the base, I used The Army Painter’s Battlefields Basing Set again.
After spreading a layer of glue as evenly on the base, it was enough to spread the grain to make it adhere and wait for the paint to dry. To give more details, once again I added small cork scraps to simulate small rocks.
Let’s spread the primer with a brush
I had this brush primer available and since I’ve only used the airbrush for a while, I wanted to try something different. To spread it I used The Army Painter’s Wargamer Large Drybrush, a flat, wide-tipped brush designed specifically for drybrushing. Spreading a primer is not like giving a coat of color. It is a little denser and it is a bit difficult to make it adhere to the plastic. Also for this reason it is always good to clean and wash all the surfaces of the miniature before proceeding with the painting. In any case, I proceeded by giving some brushes, for this reason the choice of the brush for the drybrush, waiting for the first layer to dry completely. This prevents the color from being too abundant and ruining the details of the miniature.
Base colors
For the basic colors I could only start from the uniform with an Army Green, which I applied with a Wargamer Regiment, a brush with a fairly large tip, ideal for basic colors. With Hardened Carapace, I hope I have pronounced it well, I have given a base to the helmet and the boots.
I then went on to give some simple Matt Black but using a Wargamer Character, a thinner brush than the previous one. In fact, having to paint the weapon and some smaller details, it was necessary to change it with a thinner-tipped brush.
Tanned Flesh is ideal as a base for the complexion because it is particularly dark, thus providing a base on which to build points of light to give depth to the face. In fact, you will soon see that by using a lighter color on the cheekbones, nose and chin, the face of the miniature will immediately take on depth.
There are also some leather elements in this miniature, such as the shoulder strap of the rifle or the buckles of the backpack and helmet. I used Fur Brown as a home base.
I then added some Banshee Brown on the wet palette to give the base to the last details such as the pouch containing the small shovel and the grenades, at least I think they are grenades, hanging from the belt.
Shader
As with the basic colors, I also started with the uniform for the shaders with the Military Shader, made less dense by adding equal parts of Quickshade Mixing Medium. I much prefer to use this product than plain water to thin the shaders. In fact, the medium does not make the color lose pigments, making the result more homogeneous, even if in some points it may be necessary to use more coats. Water, on the other hand, tends to thin the color too much, resulting in a “dirty” effect on flat surfaces.
As the name implies, I used Flesh Wash for our skydiver’s face and hands. Strong Tone, definitely darker than the previous wash, for the last two colored parts or the shovel bag and the grenades… or whatever.
Highlight and final details
To give the uniform some points of light I used Commando Green, not fully, however, but mixing it first with the base color, diluting it a lot to create glazes. So I gave at least two coats of color, lightening it and turning more and more towards the full Commando Green, reducing the area of action from time to time.
From here on, I continued to lighten all the highlights made darker by the shaders, either by applying the base color again, or by lightening the color with a hint of Banshee Brown. This color is in fact clear and contains some yellow.
To finish the job, I applied two silver colors to the metal parts: Gun Metal as the base, being darker, and Shining Silver in the light points, such as the parts most exposed to the light of the weapon and the uniform buckles.
Last step of color! I applied to the base of the Banshee Brown, already present in the wet palette, with the drybrush technique using the Miniature Drybrush from the Masterclass Drybrush Set.
To conclude, however, I gave a few coats of Anti-Shine Matt Varnish in the most shiny areas left by the washes to make everything opaque, finishing the job by applying a few tufts of grass to the base.
Painting Bolt Action US Airborne: conclusions
This is my second miniature made from this set. It was fun to try new things, like using the brush primer that I haven’t done in a long time. The colors are not exactly faithful of the time, next time I will try to document myself better. Although in the end I believe that it is still a game and even so they can be fine anyway.