'/%3E%3C/svg%3E)


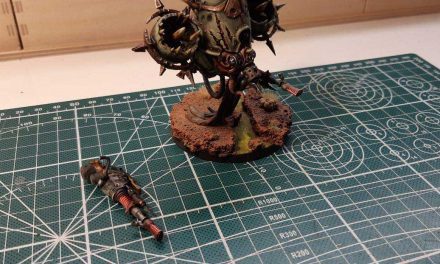
Making a glass effect for miniatures is not a very difficult thing, yet it can give a really effective touch to your miniature. To explain how to make this glass effect, I used the Biologus Putrifier. The Biologus Putrifier is one of the Warhammer 40,000 Death Guard miniatures, very different from the rest of the marines of this Chaos faction.
Indeed, the Biologus Putrifier is tasked with spreading the harmful plagues of Nurgle by refining the infected sewage prepared by the Foul Blightspawns. On his back he carries contagion grenades containing the most harmful pestilences. Together with these he also carries with him many containers of sewage that will be the subject of this video, to see together how to create a glass effect.
I bought this miniature directly from Games Workshop and it had been in my closet for over a year, certainly before Warhammer Conquest, the collection of Hachette on newsstands where this miniature was present at number 15, which in fact I have didn’t buy …
I will not stop to tell you how to paint the Biologus Putrifier, this is not what we will do today, in any case here you can find the videos on how to paint the Death Guard marines.
However, there is one useful thing to know if you want to paint the Biologus Putrifier, in fact it is better not to glue the whole miniature but to paint the body and the two racks on its shoulders separately. I have glued them here after having painted the miniature and only partially the boards, leaving the ampoules to be finished just for this tutorial. Let’s see now how to make a glass effect for miniatures!
How to make a glass effect for miniatures
First, let’s try to understand how we will achieve this effect:
We will start from a black base, imagine this is the syringe that the Biologus Putrifier is holding. We will then paint one half green as the base color.

Then we will use a lighter and very diluted color, with strokes from the bottom to concentrate the color in the upper part and thus create a gradient.

With the same color, paint some dots to simulate bubbles.

Gray will be the color we will use for the edge highlight on the dark part of the syringe.

At this point we will create a reflection due to a hypothetical light source, using white.

For the syringe we stop here, for the ampoules on the back instead the process will be the same, but we will color the black part with dark green, to simulate a “bottle glass” effect.

On all the affected parts, we will finally add a layer of Gloss Varnish, to give the ampoules and syringe a glossy effect like glass.

What colors to use for the Biologus Putrifier
These are the light and dark color pairs used for the ampoules, plus gray and white for reflections. I chose all cold shades, which seemed to me more suited to the character, but there are also those who color the ampoules all as if they contained the classic green slime of Nurgle. As always, the choice is up to you.
Wargamer Character: The Army Painter brush used in the tutorial
Throughout the tutorial, I used a medium-sized The Army Painter brush, called: Wargamer Character. So, as mentioned, I started with the basic green for the syringe, although I immediately placed all the color pairs on the wet palette, in order to have them ready for use. I then moved on to using Jungle Green, very diluted, giving more thin coats, from bottom to top, being careful not to go over the black part of the syringe.
Once dry, I drew dots to simulate bubbles. I then moved on to defining the edges of the syringe with the Necromancer Cloak. With a tip of Matt White, I drew a light reflection, you can give it the shape you prefer, maybe only horizontally or only vertically. At this point with the same technique described so far, I switched to coloring the large ampoule on the right hand and all the ampoules on the back, using the colors already positioned on the palette. Also for the base, always dilute the color and apply more layers. Take your time without rushing. Wait for one layer to dry and pass the brush again. If you are in a hurry to apply a single thick layer, you will ruin the miniature and you will hardly get shades of color.
Paint the ampoules of the Biologus Putrifier with a glass effect
Same goes for giving the color shade to the ampoules. Use the lighter color almost like a glaze, bringing the color from the bottom up, so that it settles at the top, creating that gradient we are looking for. For the ampoules I avoided the gray, preferring to color the missing part with dark green, obtained by mixing the colors already present on the wet palette. Always simulating a hypothetical light from above, as for the syringe, I created white reflections on the ampoules.
As a final touch, I gave all surfaces a coat of Gloss Varnish, a transparent product that makes the surfaces shiny.