'/%3E%3C/svg%3E)

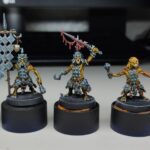
How to paint Zombicide’s zombies
The steps to be carried out are those that we have already seen in the more general guide on how to paint Zombicide:
- Preparation
- primer
- base color
- shader
- highlight
Preparation of the zombie miniature
The first step consists in cleaning the miniature excesses of printing. In Zombicide this is sometimes a real problem being the miniatures realized on hot mold. In fact, you will often find excess resin lines that run around the edge of the miniature. To eliminate them you can use a file and a scalpel gently. Remember that once you have finished this job, you will have to wash the miniature with dish soap and an old toothbrush. This is to prevent the residues from remaining on the miniature compromising the primer application in the next step.
Apply the primer
So make sure the miniature is well dry, do it again. The miniature must be WELL dried to spread the primer, otherwise it will not adhere. Don’t be in a hurry so take your time. The primer is a layer of paint necessary for the colors to adhere well to the miniature. You can use a white or black color, or if you prefer there are some “bone” primers that are well suited to the “rotten” zombie skin. Two that I can recommend and that I used for Zombicide zombies are “Skeleton Bone” and “Necrotic Flesh” by Army Painter.
Give a pair of base color hands
Now let’s give some color to our zombie! Color uniformly all the elements of the miniature: trousers, bags, laces, shirts, hair, nails and so on. Give the color evenly, using an appropriately sized brush. To start, both Army Painter brushes and Citadel brushes are great. Always keep in mind that the shader we’re going to apply with the next step will make the thumbnail darker. Then use fairly clear shades for the basic colors, so that the colors remain bright even after the shaders.
Apply the shader to start the magic
When I discovered shaders, my way of painting miniatures changed completely. It’s what they use to call “a game changer”. These are very liquid colors that will leave the background color visible, but by capillarity they will undermine the cracks, the folds of the miniature and automatically give depth and life to your work.
There are shaders for each color tone: sepia yellow, purple, various greens … but to start with I suggest brown and black. These two are fundamental. The best are the Citadels: Agrax Earthshade and Nuln Oil will never be missing in your color set.
Highlight
As a last step, use the base colors again to go over the areas most in light of the miniature that have been darkened by the shader. This will increase the contrast between the shaded and light areas. If you really want to have fun, lighten the basic colors slightly and give them even more contrast by giving a lighter color to areas smaller than those where you have already gone over the base color.
Painting Zombicide’s zombies: conclusions
Zombicide zombies, both urban and fantasy, I have painted so many. It is however one of the types of miniatures that I most enjoy making and which I believe are also the best choice for those who are beginners. You won’t have to worry too much about mistakes or details like expressive eyes, so I’m zombies right? Who cares if they are dirty, bruised and have some defect … bad going, you can always cover them with blood!